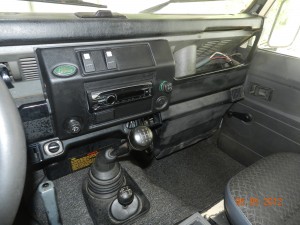
The “dashboard ” of older Defenders between the drivers panel and the passenger door is notable for its very basic design. It is very much function over form, and the function is pretty basic. There is no “glove-box”, just a 4′ wide, open area with a 2″ high lip along the bottom edge to keep anything from falling out onto the floor. There are two large “ventilator control” levers used to raise the two 2′ x 4″ metal covers than run outside between the windshield and bonnet. There is a a simple switch panel in the lower central section of the dash that almost seems like an afterthought to hold the cigarette lighter and the switch for the rear windshield washer. As to where one puts a radio I was left guessing. Our vehicle must have had a radio and other electrical accoutrements at some point, the motley collection of wires that protrude from a hold in the bottom of the dash attest to that. Some of these wires go to speakers to the sides of the roof panel above the front seats, others go to the an elaborate electrical box mounted in the rear fender to house an external AC plug-in and outlets for accessories. The speakers were still installed, but were very worn out and we removed and discarded them when we redid the roof panel. All the wires are still in place.
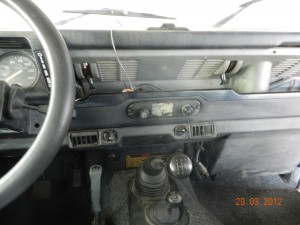
Our ideas for upgrading the dash range from creating and installing attractive hardwood “glove-box” doors that would hinge from the flat bottom lip of the dash to close under the top dash. This would add some visual ascetic appeal as it would conceal the open area. The downside is that these cover the vents that are designed to allow air to flow in (or, as James May of Top Gear jibed “just in case it isn’t noisy enough inside already”), but this is not such a concern when we have air conditioning. I have even purchased some mail-order hinges from a cabinetry shop in Canada (Lee Valley) that may work for the this, finding the hardwood here that is thin enough is proving to be more of a challenge.
However none of this addresses the problem of how to mount a radio. This vehicle must have had a radio, the wires are still there, as are two now-defunct 6 1/2 inch speakers mounted in the ceiling panels above the front doors on either side, but there is no evidence of where the radio might have been mounted. There are no holes that suggest there might have been a radio housing screwed in somewhere. However, none of this addresses the problem of how to mount a radio/CD player. No holes remain visible in any part of the dash that suggest screws were once mounted there.
We opted to get a console from MUDSTUFF, www.mudstuff.co.uk/index.shtml , a company in England that produces a range of aftermarket accessories designed for Land Rovers. The console is simply a plastic form that comes with a metal mounting frame and installation instructions. The user can choose whether they want to use the console to mount switches, meters, a radio, and the precise location of each. I ordered the console, a radio mount, an additional plug-in for AC power and some switches for lights and other accessories.
Installation was not terribly difficult, although it took longer than it would have if I had access to the tools I have storaed in Canada. I did bring a set of basic hand tools with me, which I have supplemented with a ratchet set that I purchased here. I am getting good use of all these, but I do not have any power tools. I had brought a set of light Black and Decker battery-operated tools, but the charger is not working here and it is only possible to get very light work done before the batteries expire. To install the console it is necessary to remove a section of the dash that requires cutting through a foot long section of metal. Getting the tool to do this proved to be the most difficult and time-consuming part of the project.
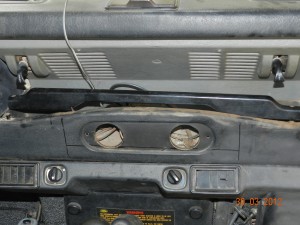
I asked around to see who might have an electric hacksaw and ended up dealing with James, who is a contractor to the property management team at the High Commission where I work. James came by and quickly determined that a hacksaw was not going to do the job and we went off together last Saturday morning to a metal shop that had a “grinder”. This is a fairly heavy duty rotary tool that can be mounted with a range of different 4″ blades. It was noisy, messy job that took about 20 minutes and GHC 15 ($10), with another GHC 20 for James as fixer, a role which in addition to getting me to the grinder included some other drilling work in the console panel itself that he did with his own electric drill.
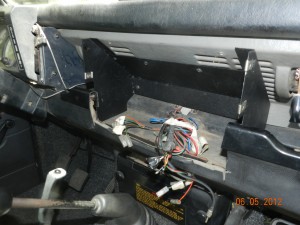
At this point there is a bit of a sick feeling because all you have is a big gash in the dash and the panel that held the lighter and rear windshield washer switch is gone. From there is was more satisfying. The metal mounting plates for the console screwed into the area between the vent levers without difficulty. The vehicle has a plastic trim piece that runs along the top of the bottom front lip of the dash catch area that has to be cut. I had to stop in the middle of the installation to go up to Opere’s to borrow a simple hacksaw blade to cut the trim because I don’t have one of those either. It took five minutes to do the cutting but almost an hour to get there and back. I really miss my tools.
The biggest challenge was adapting the console and the air conditioning unit. Distribution of A/C in a Defender, at least in ours, consists of a 2-3″ high channel that screws snugly along the flat bottom of the dash. The MUDSTUFF console has a wide plastic flange e that is designed to slip between the A/C unit and the dash, which helps to establish a firm footing for the console. Unfortunately, I had recently had my A/C unit remounted complete with a screw right in the area where the flange has to go, which prevented the console base piece from slipping in. The amount of time I had to spend unmounting and remounting the A/C unit before I realized all I really had to do was cut the flange was incredible.
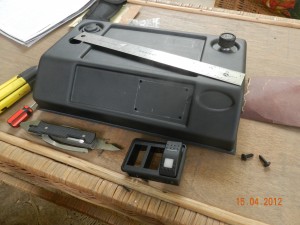
Cutting the holes in the console required some precision, and again the lack of tools was a pain. I could mark out the places for the radio, the switch plates, and the AC power converters (cigarette lighters), but cutting them out was more difficult. I was able to coax enough power from my B&D battery operated drill to cut round holes in the corners of the square holes for the radio and switch plates, but had to get James cut the lines to complete the job. With that I was able to mount everything into the console and install it. It is only a temporary placement of course , we don’t have speakers yet for the radio, or light to hook onto the switches yet, but the unit can be easily removed with three screws to get at the backs of the switches and the radio casing to complete the hook-ups.
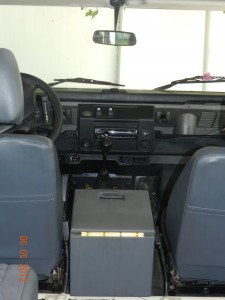
We still have to run the wires to the unit for radio and switches, but I am waiting for the lights from SA Africa (separate post coming on “a shopping trip like no other”) and we are still in the market for speakers, that one is getting to the top of the priority list .
Other project ideas for the interior front include the replacement of the vinyl-trimmed top of the cubby box between the front seats with a more attractive hardwood panel, and doors fro the dash from the same material. Then there are a whole list of things to do to make the cargo bay expedition ready. One of my biggest problems now is limited time. There is only so much you can do on weekends, I need to stop working long hours in the office, and using my vast stores of accumulated leave to devote to the Landy project.
